Fishing is a timeless hobby enjoyed by many, and I’ve found that making my own fishing lures can be as rewarding as the actual process of fishing. Homemade fishing lures provide a personalized touch to an angler’s arsenal, and crafting them can be a fun and creative project to embark on. In this article, I will walk you through the essential steps on how to make fishing lures, discussing various materials, designing, shaping, and painting techniques.
Before diving into the process of making a fishing lure, it’s essential to choose the right material. I usually prefer using wood, particularly pine or balsa, as they are relatively easy to work with and provide a solid base for the lure. Once the material is chosen, the next step involves designing the lure; this will determine its appearance and functionality in the water, ultimately leading to successful catches.
After designing your lure, it’s time to cut the material into shape, followed by painting it to create an appealing and realistic look. This is the exciting part, where artistic flair and attention to detail come into play. In addition, making sure the lure moves naturally through the water is essential, so I’ll guide you through choosing the right hooks and weighting systems. Overall, creating your own fishing lures is a fulfilling and cost-effective way to enhance your angling experience.
Understanding Fishing Lures
Types of Lures
As an angler, I have experience with various types of fishing lures. Here are some of the most common ones:
- Crankbaits: These lures resemble small fish and produce an erratic action when retrieved. They are great for covering large areas of water quickly.
- Spinnerbaits: A combination of a spinning blade and jig. The blade creates vibrations in the water, while the jig mimics a small baitfish.
- Soft Plastics: These lures include worms, grubs, and crawfish imitations. They are versatile and can be used in various techniques like Texas rigging or drop shotting.
Material Choices
In my experience, the materials you choose for making your fishing lures can have a significant impact on their performance. Here are a few popular options:
- Wood: Many traditional lures are made from balsa or pine wood. These materials are easy to shape and provide a buoyant and lively action in the water.
- Plastic (Resin or Soft Plastics): Plastic lures can be molded into various shapes and designs, making them perfect for creating soft plastic baits and hard plastic baits such as crankbaits and lipless lures.
- Metal: Metal lures, like spoons and spinners, are durable and create vibrations in the water that attract fish.
When making fishing lures, it’s essential to consider the type of lure you’re creating and the materials that will best suit its purpose.
Basic Tools and Materials
Tools Required
As someone who makes fishing lures, I find it essential to have some basic tools. These tools not only make the process smoother but also help me create high-quality and functional lures:
- Pliers: I use needle-nose pliers for bending and cutting wire.
- Scissors: A good pair of scissors helps me cut materials such as aluminum foil, tape, and plastic sheets.
- Sandpaper: I use sandpaper to smooth the surfaces of my wooden lures.
- Drill: A small hand drill or power drill is useful for creating holes in the lures for attaching hardware.
- Paintbrushes: Various sizes and types of paintbrushes are necessary for painting and sealing lures.
- Saw: A small hand saw or coping saw is helpful for cutting out lure shapes from wood or plastic.
Materials Needed
Creating fishing lures requires different types of materials, depending on the lure I’m making. Here is a list of materials I commonly use:
- Wood: Wooden lures are both durable and buoyant; balsa and basswood are popular choices.
- Metal sheets: Patterned aluminum foil or thin metal sheets can be used for creating spoon-type lures.
- Paint: I use non-toxic, water-resistant paint to add colors and patterns to lures.
- Hooks: Various sizes and styles of fishing hooks should be available in my arsenal.
- Screw eyes: Closed screw eyes are used to attach hooks and other hardware to lures.
- Wire: Heavy-gauge wire helps in making spinners or through-wire construction.
- Beads, swivels, and split rings: These components are useful for assembling lures, ensuring they perform well in the water.
- Clear sealer: I prefer using a clear epoxy sealer to protect the paint on lures and provide a durable, glossy finish.
Once I have acquired the necessary tools and materials, I can start creating my own custom fishing lures with ease. Making lures is a fun and rewarding hobby, and with practice, I can create effective and attractive lures that help me catch more fish.
Creating your Fishing Lure Design
Selecting the Right Lure Style
In my experience, the first step in designing a fishing lure is selecting the right lure style. There are various types of lures, each designed for specific fishing conditions and techniques. I start by considering the target fish species, the water conditions, and the desired fishing technique. Here are a few popular lure styles:
- Topwater lures: These float on the surface and are effective in shallow water or for attracting aggressive fish.
- Crankbaits: With their diving lips, these lures can reach different depths and mimic injured fish.
- Soft plastics: These versatile lures can be used with different rigging techniques, and they often resemble worms, crawfish, or other natural prey.
Once I choose the lure style, it’s time to work on the size and shape. For instance, if I’m targeting bass, I prefer a larger and bulkier lure, whereas for panfish, I go for a smaller presentation.
Color and Pattern Selection
The next step in my design process is to determine the appropriate color and pattern for the lure. This usually depends on factors such as the target fish species, water clarity, and light conditions. Here’s a simple guideline I follow for color selection:
- Clear water conditions: I go for natural and muted colors, such as greens, browns, and transparent hues.
- Stained or murky water: In these conditions, I opt for bright and high-contrast colors, like chartreuse, orange, or bold patterns.
- Low light conditions: I use dark colors, like black, blue, or purple, which create a strong silhouette underwater.
I have also found that incorporating reflective elements, like foil or holographic patterns, can make the lure more visible and attractive to the fish.
When creating the pattern, I often aim for realism by mimicking the look of a natural prey. This can include adding details like scales, eyes, and fins. In some cases, I experiment with abstract designs or contrasts that may trigger the fish’s curiosity or aggressive instincts.
By carefully selecting the lure style, size, color, and pattern, I can create a custom fishing lure that effectively attracts my target species and increases my chances of success in various fishing conditions. Keep in mind that practice and experimentation are essential in honing your lure-making skills, so stay persistent and have fun with the process.
Making the Lure Body
Carving or Molding
When making my own fishing lures, I start by choosing whether to carve the lure body out of wood or mold it from a material like soft plastic. If I decide to go with wood, I find a suitable piece and sketch the desired shape of the lure onto it. Then, I carefully cut along the outline using a coping saw or jigsaw. Once the rough shape is formed, I use a rasp and sandpaper to refine the contours of the lure.
On the other hand, if I prefer molding my lure body, I can use materials like soft plastic or clay. For soft plastic lures, I create a two-part silicone mold using an existing master lure, and then pour heated plastisol into the mold. When the plastisol cools and hardens, I remove the finished lure from the mold.
Adding Weighting and Balancing
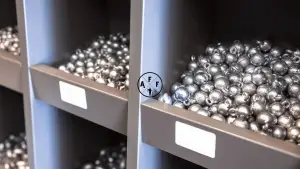
After I have the rough shape of the lure body, it’s essential to add weighting and balancing elements. This ensures the lure will swim correctly in the water, imitating the movement of real fish. Some materials to use for weighting include lead, steel, or tungsten.
To begin, I drill pilot holes into the lure body where the weights will be added, typically around the center of gravity or near the tail to alter the swimming action. I then melt and pour the weighting material or insert appropriate-sized weight beads into the holes. Once the weights are added, I seal the holes using epoxy, wood filler, or a similar material.
Now that the weights are in place, I test the lure in water to see how it behaves and make sure it’s balanced correctly. If necessary, I make adjustments by adding or removing weight until the desired swimming action is achieved.
Remember that as you follow these steps to create your own fishing lures, it’s essential to practice proper safety precautions, take your time, and continuously hone your crafting techniques. With patience and practice, you’ll be able to create effective and customized fishing lures for your next angling adventure.
Painting and Finishing the Lure
Priming and Painting
When I paint and finish my fishing lures, I first prepare the lure by applying a clear sealer as a base coat. I prefer using a clear epoxy sealer, which I spread over the entire lure in a thin, consistent layer. The easiest technique I use is dipping the complete lure in the sealer and then hanging it to dry.
Once the sealer has dried, I begin the painting process. I typically use enamel paints or acrylic water-based paints, as these are best suited for airbrushing. Goopy craft store acrylic paints are not recommended. While painting, I take care to:
- Use gentle, meticulous brushstrokes
- Blend and fade colors as needed
- Have multiple lures nearby to start over if I make a mistake
- Practice imitating natural patterns, as they suggest familiar prey to fish
Applying Clear Coats
After I’m satisfied with my painting, I apply a clear epoxy finish to the lure to protect the paint and make it waterproof. I hang up the lure and allow it to dry completely before testing it out in the water.
Overall, painting and finishing a fishing lure requires practice, patience, and attention to detail. However, the end result is a unique and customized lure that can attract a variety of fish species.
Adding Hooks and Hardware
Choosing the Right Hooks
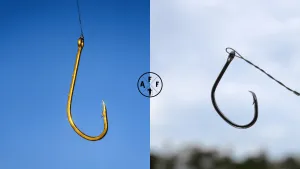
When I create my fishing lures, the first thing I consider is choosing the right hooks. The type of hook used is crucial for the lure’s effectiveness. The factors to consider include hook size, hook type (treble or single), and hook material.
- Size: The hook size should correspond to the size of the lure and the intended target fish. Generally, a smaller hook is suitable for smaller lures and smaller fish, while a larger hook is needed for larger lures and fish species.
- Type: Treble hooks are commonly used for most fishing lures due to their increased chances of hooking a fish. However, single hooks may be preferred for a more natural presentation or in circumstances where treble hooks are not allowed or discouraged.
- Material: Hooks should be made of high-quality, corrosion-resistant materials such as stainless steel or high-carbon steel. This ensures they last longer and do not rust, which can affect the lure’s performance.
Assembling the Lure
Once I’ve selected the appropriate hooks and hardware, it’s time to assemble the fishing lure. Below are the steps for adding hooks and hardware to a lure:
- Attach eyelets: If the lure requires eyelets for connecting hooks, I install them on the lure body. Typically, one eyelet at the back-end and another on the belly, near the middle but closer to the front. Alternatively, a hole for through-wire construction should be drilled.
- Thread split rings: I thread a split ring onto each eyelet, maintaining a low profile to minimize interference with the lure’s action.
- Attach hooks: I then connect a treble or single hook to each split ring, ensuring that they have the freedom to move and facilitate successful hookups.
- Add additional hardware: Some fishing lures might require additional hardware like swivels, propellers, or beads. In these cases, I follow the lure design’s instructions for proper assembling and positioning.
Remember to avoid making exaggerated or false claims about your handmade fishing lures and stay confident and knowledgeable about your lure-making process.
Testing and Adjusting the Lure
Swimming Action
Once I’ve finished crafting my fishing lure, I need to test its swimming action before taking it out for real-world usage. To do this, I fill a container or use a clear body of water where I can easily watch my lure. I then attach the lure to a fishing line and mimic its movement in the water. This helps me check if the action is realistic and enticing enough to attract fish.
If the swimming action isn’t as expected, I may need to make adjustments to the lure. Sometimes, this could involve changing the lure’s weight distribution or the angle and position of the diving lip.
Fine-Tuning
Once I’m satisfied with the swimming action, I may still need to fine-tune the lure. Here are some aspects I consider when fine-tuning my fishing lures:
- Weight: If the lure is not sinking or floating as desired, I can add or remove weight in different areas until I achieve the desired buoyancy.
- Hooks: The type and size of hooks can affect the lure’s action. I might need to experiment with different hook types and sizes to find the best fit for my lure.
- Paint and Finish: To make my lure more visually appealing, I may need to polish or repaint it. I use an airbrush to evenly apply paint to the lure (taken from search results). A clear coat can also be added for durability and shine.
- Split Rings and Connections: I need to ensure that all connections are secure and allow for appropriate movement. If not, I may need to change the split rings or use different types of connectors.
By testing and adjusting my fishing lure, I can achieve the desired results for attracting fish. Through trial and error, I can continuously improve my lure-making skills and create customized lures tailored to specific fishing conditions and species.
How to Make Fishing Lures in a Nutshell
In my journey to create fishing lures, I discovered that it’s not only a fun and rewarding process but also offers the advantage of using unique and personalized lures. I found that fish can learn from being hooked and develop a memory about lures, meaning that creating my own lures can provide a competitive edge in heavily fished areas.
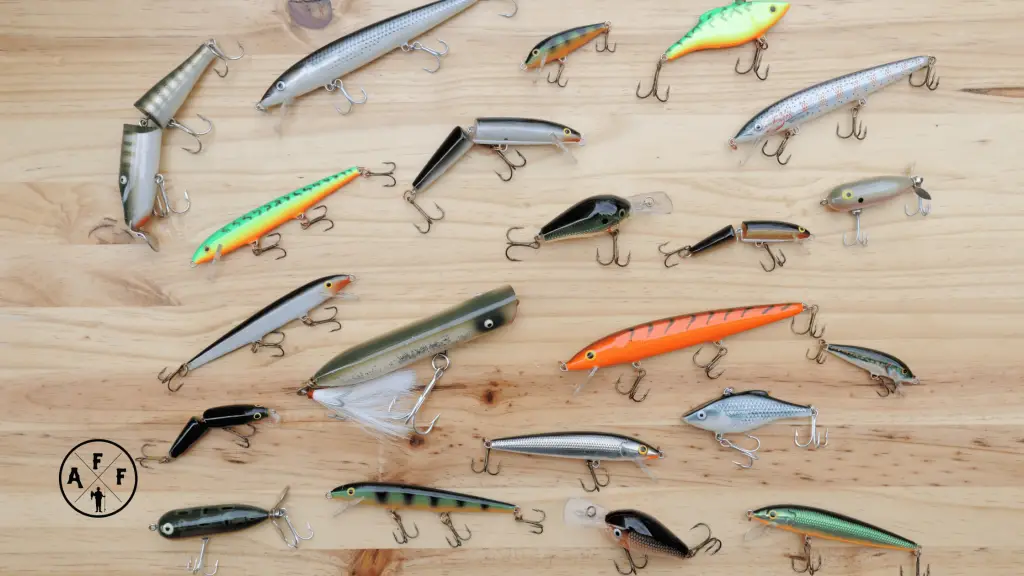
During the process, I experimented with different materials like balsa wood and plastic. Balsa wood lures offered a lightweight and buoyant option, while plastic lures allowed for more flexibility in design and durability. Regardless of the material, it was essential to choose a size that matched the fish I was targeting.
By following these basic steps, I was able to create fishing lures suited to my own preferences and the fishing conditions:
- Select materials: balsa wood or plastic
- Determine lure size and design
- Shape and refine the lure
- Add hooks, eyes, and other necessary attachments
In conclusion, making my own fishing lures has given me a deeper appreciation for the art of fishing and the role that lures play in the success of my fishing ventures. Equipped with a range of custom lures, I am more prepared to face changing conditions and diverse fish populations.